
Tiny Clothes Getting You Down? Read On…
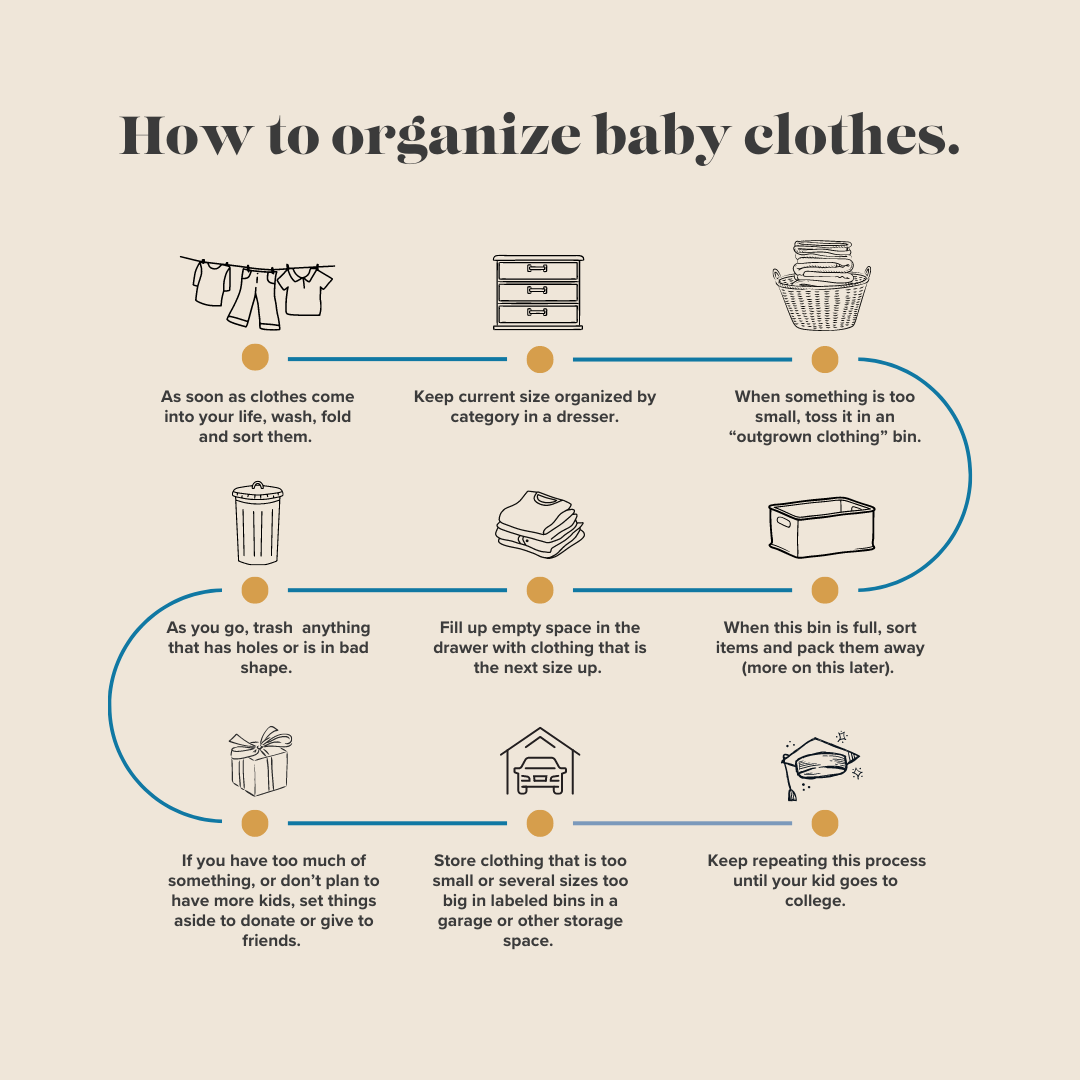
We did a poll on Instagram recently and overwhelmingly (and expectedly) the response was that parents are desperate for a better solution for organizing baby & kids clothes. As a newish parent myself, I deeply identify with this struggle. A steady stream of incoming clothing (gifts, hand-me-downs, midnight breastfeeding purchases, the Hanna Andersson sale that seems to happen 20x a year!) combined with a child that grows at the speed of lightning means a lot of opportunity for clutter and stress. But fear not! We’ve created (dare we say, perfected?!) a system that has been working well for my 11-month-old Finn and for our hundreds of clients here in LA, and now I’m sharing our secrets with you. Let’s get into it.
As soon as clothing comes into your life and you know you’re keeping it, remove all tags, wash, and fold the clothes. Sort it by size, as well. Keep your child’s current size and the next size up in your home, and then set things they’ll grow into later aside, we’ll deal with those later.
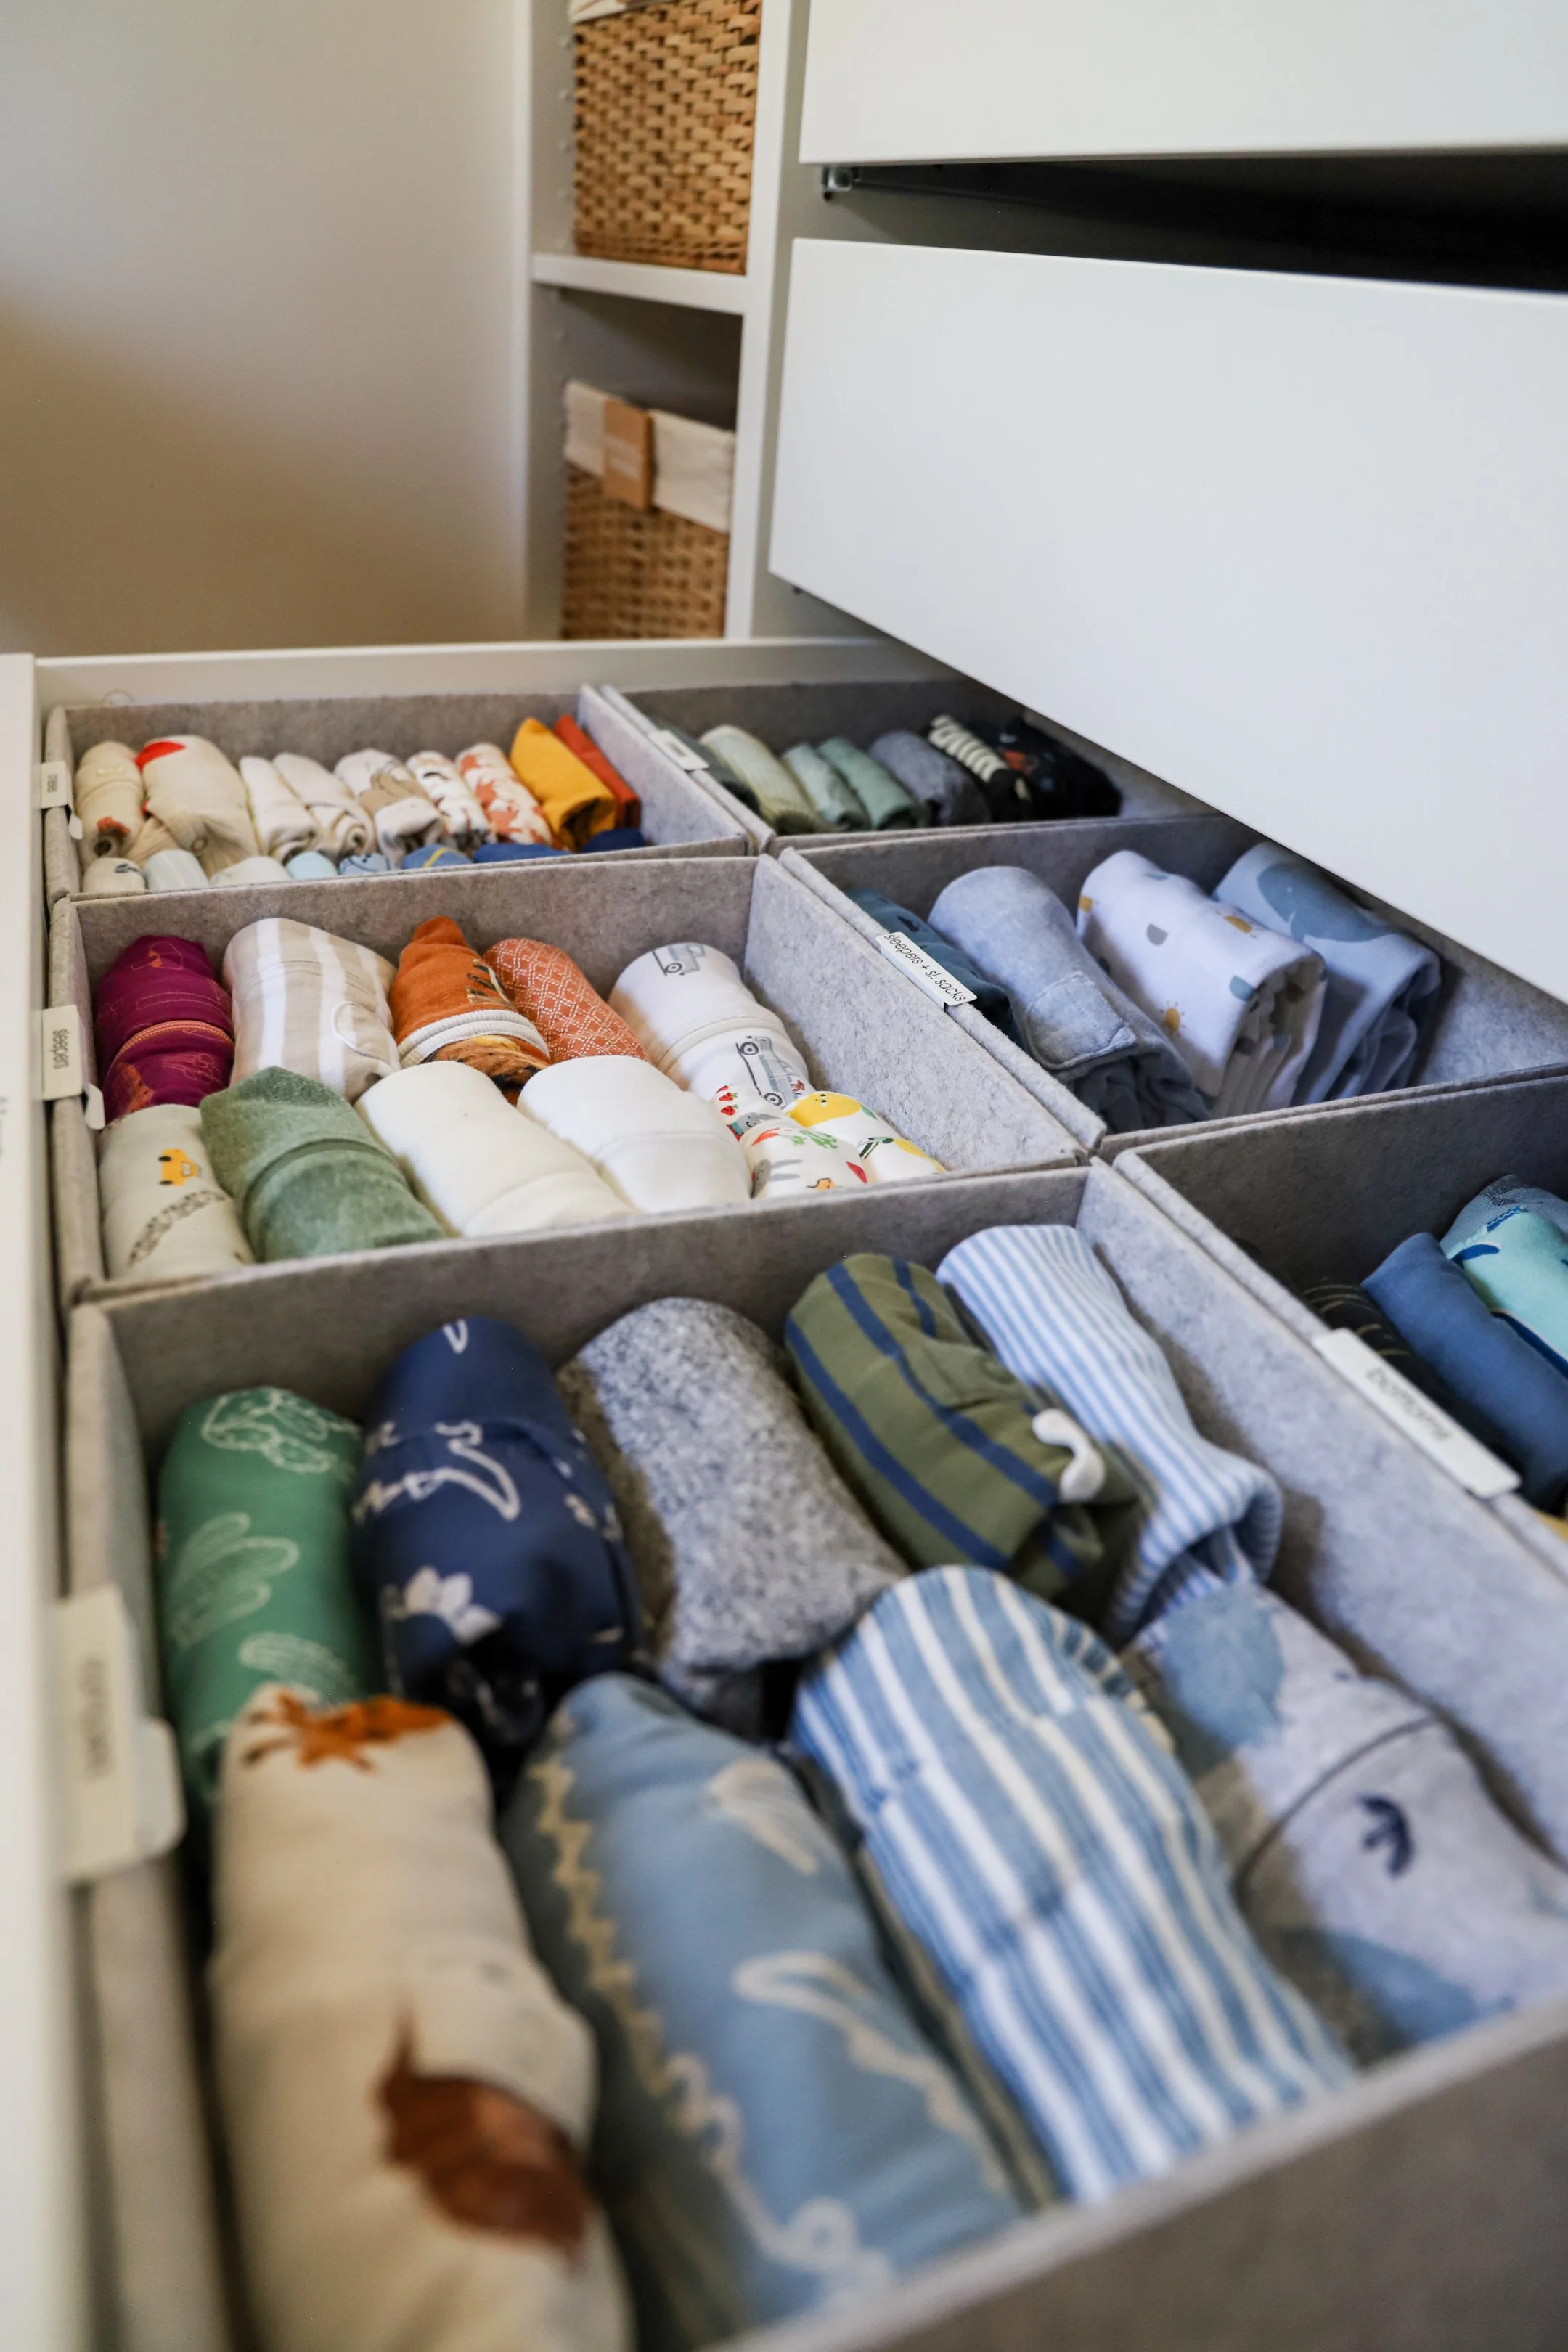
You’ll want to store current clothing by category in an easy-to-access dresser drawer or two (or if you don’t have a dresser, cotton baskets in a closet work well too). Common categories include pajamas, bottoms, tops, onesies, socks, hats, swim, etc. Use a label maker to label your categories, and don’t worry about being too overly detailed here. Baby clothes are super teeny and you don’t want to have a million different categories.
Next, you need to set up an “outgrown clothing” bin nearby. I like this to be an open basket that is labeled so everyone in your household knows what it is. As soon as you notice something is too small, toss it in the bin (clean). Once this bin is full, carve out a little time to do your swap.
Take the bin down, sort everything by size (mostly everything in there will probably be the same size), fold it and store it either directly in a lidded storage bin, or in a canvas storage cube that will go in that bin. Don’t forget to label so you remember what’s in there. This is also a great time to do a once-over of your kid’s drawers to make sure you haven’t missed anything that’s too small.
Now that you have empty space in the drawers, fill ‘em up! If you’ve been following this system already, you likely have a stash of clothing that’s the next size up. Sort these clothes into the appropriate categories and file them away in the drawers. If you need to adjust any categories, it can be handy to have tension dividers and your label maker available.
One note: if you come across something that you didn’t love (and don’t want to save for the future), you aren’t morally obligated to keep it. Storing things takes resources (time, space, the money for bins, etc.) so don’t waste your precious space on items you might not want to use again. Donate things that are in good condition and toss things that are too stained or ripped to wear again. This is also a good idea if you have too much stuff. Some of us are lucky enough to have tons of great hand-me-downs, but if you don’t have space to store all of them, pick your favorites and pass on the rest.
Now that your kid’s drawers are filled and organized with current-size clothing, if you have room in his/her space to store the next size up too, do it! We keep my baby’s in his bottom drawer and in a small basket above. This way, if I notice he has a growth spurt I can grab something from the next size up without going into the garage. Everything else that’s too small or way too big lives in the garage.
There you go! This is a cycle that you will keep doing over and over and over again (and then repeating through for siblings). With a good label maker and places to put everything, I feel confident you’ll be able to stay on top of it all!
As always, if you have any questions let me know in the comments!
